Metal roofs earn their keep over decades, but they demand careful attention where panels meet, where fasteners bite into structure, and where sealant bridges movement. In the field, most leaks and premature failures trace back to those three zones. Get them right, and a properly installed roof runs quietly for 40 years. Neglect them, and a three-year-old system can behave like it is on its last legs.
This is a deep dive into diagnosing and repairing seams, fasteners, and sealants across both residential metal roofing and commercial metal roofing assemblies. The practical details here come from wet boots, infrared scans, and a lot of afternoons spent chasing pinhole leaks that only show up during a north wind.
Where metal roofs really fail
Metal panels are strong. Their weak points are not the sheets themselves but the connections that hold the system together and allow it to expand and contract. Thermal movement is the unrelenting force behind most issues. A 60 foot run of steel can move by half an inch or more across a 100 degree swing. That movement telegraphs through seamed joints, loosens fasteners, and pumps sealant until it fractures.
Moisture nearly always finds the smallest opening. Capillary action pulls water uphill into tight seams, wind-driven rain defeats shingled laps that would otherwise be fine, and UV bakes sealant until it chalks and loses elasticity. Once rust starts around a fastener, the hole grows, the screw loses bite, and the leak grows from a stain into a drip.
Understanding those mechanics guides better inspection and repair. The aim is not just to stop water today, but to restore the detail so it survives movement tomorrow.
Anatomy of seams: through-fastened, snap-lock, and mechanically seamed
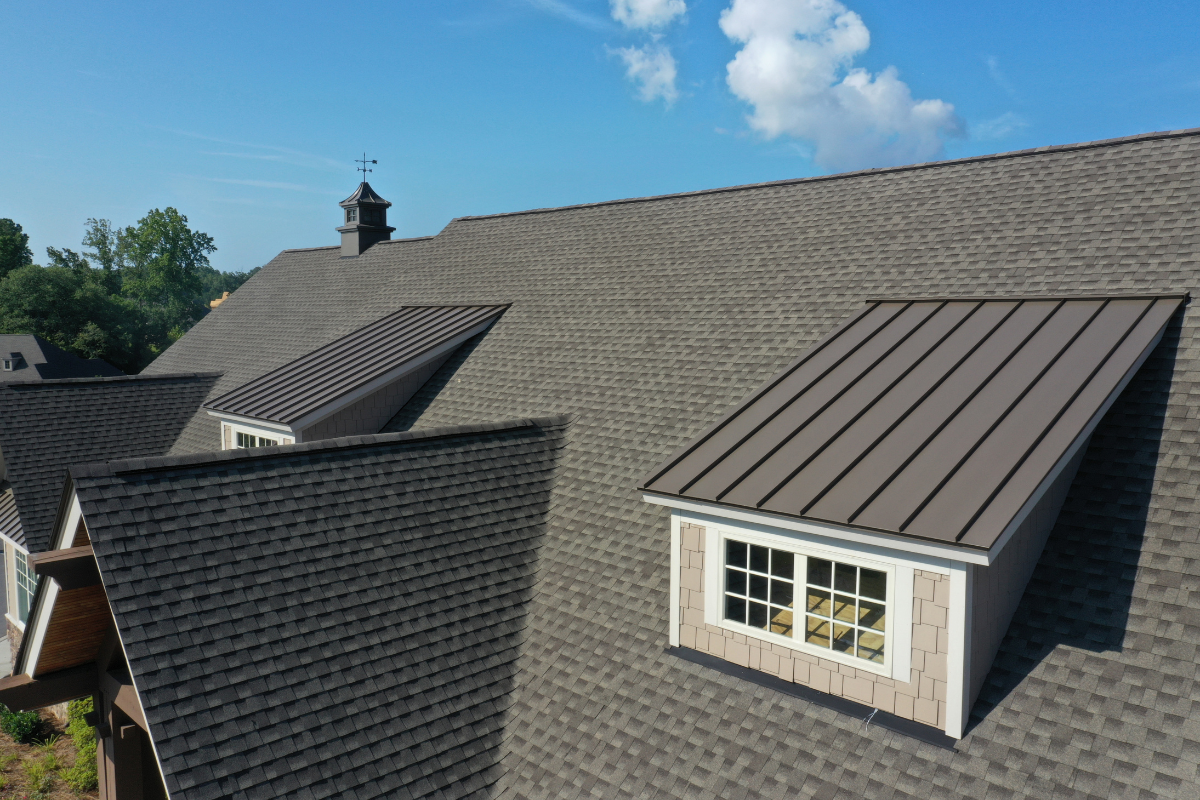
On residential metal roofing, classic exposed-fastener panels, often called R-panel, AG panel, or 5V, rely on side laps with sealant tape and a stitched fastener pattern. On commercial metal roofing systems, standing seam dominates, either snap-lock profiles on shorter runs or mechanically seamed profiles on longer, higher-performance roofs.
Each profile has different failure modes.
Through-fastened panels typically leak at side laps where the butyl tape has flattened, shrunk, or split, and at end laps where insufficient over-lap or missing sealant allows capillary draw. Screws installed slightly off perpendicular can create a high side, opening the lap. https://travishsux358.huicopper.com/commercial-metal-roofing-noise-and-vibration-control-solutions These panels are more forgiving to install but less forgiving of thermal movement, because the entire panel is pinned at each fastener.
Snap-lock standing seam resists leaks at the horizontal seams, but it can open at panel ends, ridge transitions, and at clip locations if clips were spaced too wide for the wind exposure. In rare cases, wind vibration can unseat a snap during a severe event. Field-applied sealant is minimal in these systems, so fixes tend to focus on re-engagement, securement, and properly detailed closures.
Mechanically seamed systems, the workhorses of commercial roofing, can run 100 feet without a fixed pin if they are designed correctly. Still, issues arise at panel endlaps, perimeter details, curbs, and penetrations. If the field machine formed a cold seam on a chilly morning, that fold can be weak. Likewise, a seam that trapped sealant in the wrong place can fishmouth slightly, letting wind-driven rain ride up the seam.
An accurate diagnosis starts with identifying the profile, then tracing the leak backward from the stain to the nearest seam intersection or penetration.
The fastener story: pullout, back-out, and corrosion
I have walked roofs where a thousand screws still look crisp and twenty have backed out enough to create active leaks. Those twenty are not random. They often sit on purlins that twisted, at ridge caps where wind pressure is highest, or along eaves where thermal cycling is aggressive. Exposed-fastener systems depend on those fasteners to seal at the grommet. Over time, neoprene washers harden. When a screw backs out by even a thread or two, the washer loses compression, and water rides the threads into the substrate.
In coastal zones or near industrial emissions, galvanic and atmospheric corrosion accelerates around fastener heads. Stainless screws in aluminum panels avoid some of that, but mixing metals can create its own galvanic couple. The safest path is to match fastener metallurgy to manufacturer guidance for the panel system and local conditions, and to trust tested assemblies over improvisation.
Hidden-fastener standing seam systems use clips attached with pancake-head screws or structural fasteners sized to substrate and wind loads. These screws rarely leak directly, but they affect panel movement. If the clip is fixed where it should be floating, stress transfers into the seam or panel pan, causing oil canning or seam separation.
Sealant, the helper that sometimes hurts
Sealants earn their bad reputation when they get used to compensate for poor detailing. Slathering generic silicone on a lap that needs butyl tape and correct compression is a temporary fix at best. Done wrong, it actually traps water and hides structural problems.
Used properly, sealant is invaluable. Butyl tape in side laps and end laps, non-skinning gun-grade butyl in certain closure details, and high-solids silicone or polyurethane for exposed flashing seams serve different roles. Compatibility matters. Some panels carry factory-applied paint systems like Kynar 500. Many sealants do not bond well to that finish unless the surface is cleaned and lightly scuffed per manufacturer instructions. A cheap acetoxy silicone often peels in sheets within a season. Field-applied sealant must also allow movement. A joint that cycles daily needs sealant sized for the expected movement rate, with the correct joint depth-to-width ratio and a bond-breaker or backer rod where appropriate.
A practical inspection routine that actually finds leaks
A thorough inspection pays for itself. On metal roofing installation projects, we often schedule one during shoulder seasons after big thermal swings, because problems show more clearly.
Here is a concise, two-part checklist we use in practice. Keep it short and systematic.
- Walk the roof after a rain or early morning dew. Look for water tracks, bright spots around fasteners, and dirt lines that point to capillary movement at laps. Check fasteners mechanically. Spin a driver on low torque. If a screw turns freely before seating, test pullout on that run. Replace outliers with larger-diameter fasteners and new washers. Probe seams with a plastic spatula, not a screwdriver. You want to feel separation without gouging. A lifted side lap or fishmouth at an endlap calls for disassembly and new butyl, not surface caulk. Examine penetrations, curbs, and perimeters. Most leaks start at pipes, HVAC curbs, skylights, or wall transitions. Verify closures are present and breathable where needed, and that foam closures have not turned to powder. Inspect sealant for chalking, cracking, or loss of adhesion. Gently lift at an edge. If it peels off cleanly from one side, the bond failed. Plan for cut-out and reapplication, not top-coating.
This routine takes one to three hours on a typical residential metal roofing system and half a day on a mid-sized commercial metal roofing project. Document with photos and note panel directions and prevailing wind.
Fixing seams: when to re-seat, when to re-lap
Side laps on through-fastened panels can be restored if the metal is sound. The right method is patient, not heroic. Back out stitch screws along the lap. Separate the lap just enough to clean it. Old butyl tape often comes off in strings. A plastic scraper and a mild solvent approved by the panel manufacturer remove residue without damage. Lay fresh butyl tape, continuous with no gaps, then re-seat the lap and reinstall stitch fasteners on the correct spacing. Avoid overdriving, which squeezes out too much butyl and starves the joint. The aim is consistent compression.
End laps need more care. Many leaks here come from insufficient overlap or a lack of end-dam sealant. If the lap is less than the manufacturer’s minimum, usually 6 inches with a bead of sealant near the drip edge, consider adding a cover plate or, in some cases, cutting back and installing a new transition with a Z-closure. On structurally spanning panels, an incorrectly lapped end can flex and pump water uphill during wind. Do not rely on surface sealant to fix that. Correct the geometry.
On standing seam systems, most seam issues call for mechanical re-seaming. For double-lock profiles, use a portable seamer to re-engage the fold. Before running the machine, inspect for trapped debris and misaligned clips. If a seam has opened due to clip restraint, you may need to convert a fixed clip to a sliding clip in that bay, then re-seam. Hand seaming is sometimes necessary at short runs or near penetrations, but it takes a gentle touch. Sharp bends weaken paint and can start corrosion on cut edges if not treated.
Fastener repairs that last
Replacing a handful of screws is easy. Replacing them correctly is less obvious. Match the thread type to the substrate, whether wood purlin, metal purlin, or light-gauge deck. If the hole is wallowed out, do not reuse the same diameter. Step up by one size, or use a fastener designed with a larger root diameter and oversized washer. On older roofs, I often specify long-life fasteners with encapsulated washers. They cost a bit more, but they hold compression better and resist UV longer.
Torque is critical. A driver set too hot cuts grommets. Set your clutch low and seat the washer just to the point where it mushrooms slightly and the washer edge contacts the panel evenly. Randomly strip-testing one fastener per square makes crews more consistent.
For hidden-fastener standing seam, if pullout is a concern at the clip screws, add supplemental fasteners in the same line rather than adding a new clip off-pattern. Recheck movement. If too many clips bind, the panels will buckle at mid-span under heat, and you will trade leaks for deformation.
The right sealant for the joint
Not all sealants belong on a roof. I have seen polyurethane construction sealant bond beautifully to concrete and poorly to a fluoropolymer-coated panel. For metal roof repair across varied climates, a pragmatic short list holds up well:
- Butyl tape or butyl-based mastic for side laps, end laps, and closures that need a non-skinning, compressible seal inside the joint. It stays tacky and allows some movement without tearing. High-solids, neutral-cure silicone for exposed terminations where UV is severe and joint design allows proper movement. Verify compatibility with Kynar or SMP finishes and use primer if the manufacturer requires it.
Keep joint design in mind. Deep, narrow beads are wrong. Aim for a width that supports the expected movement with about half the depth of the width, using backer rod or bond-breaker tape to avoid three-sided adhesion. Cleanliness counts more than brand. Wipe with approved cleaner, allow to flash off, and apply within the window the manufacturer recommends.
Penetrations and flashings: the wild cards
Even the best field seams will lose the fight if a pipe boot fails. Rubber storm collars crack in sun and shrink in cold. On residential metal roofing, retrofit boots with flexible aluminum skirts can work well, but they require careful shaping over the ribs and a proper bead of butyl under the skirt. Then stitch-screw on the flats, not into the rib peaks, and dress the top edge with sealant compatible with the boot material.
Commercial curbs deserve shop-fabricated flashings tied into the standing seams or secured with Z-closures and counterflashing. The simplest rule is to shed water like shingles, but with metal, you also need to allow for movement. Fixed counterflashing that pins to the curb on all four sides will eventually tear the pan or split the sealant. Use slotted holes and slip joints so the roof can move independently of the curb.
Skylights are similar. Frame height, slope, and regional snow loads dictate details. The safest path is to follow the panel manufacturer’s curb and cricket details. If an older skylight leaks, replacing the unit and re-flashing the curb often costs less than chasing seam sealant around it for years.
Coatings, overlays, and when to stop repairing
Coatings on metal roofing can extend service life if the metal is still structurally sound. I have seen 15 year warranties hold up with elastomeric coatings applied over thoroughly prepped panels, fasteners re-driven, and seams reinforced with scrim. The key is prep. Clean, rust-treat, prime per system requirements, and build the film to the specified dry mil thickness. Skipping fastener caps or scrim at side laps is how a coating fails early.
That said, coatings are not magic. If the roof has widespread structural corrosion, pinholes through the pans, or persistent condensation issues inside the assembly, a coating hides problems instead of fixing them. Likewise, on an exposed-fastener roof with thousands of brittle washers, a coating can slow leaks but will not stop them entirely without full fastener replacement.
There is a point where metal roof replacement is the responsible recommendation. If more than 20 to 30 percent of fasteners are compromised, panels are rusting through, or the panel profile is obsolete and replacement parts for flashings and accessories are unavailable, start planning for new metal roof installation. The better metal roofing contractors will lay out a phased plan that solves urgent leaks now and budgets for a full replacement within one to three years.
Weather, slope, and region change the playbook
An assembly that never leaks in the high desert can struggle on a coastal ridge. In high wind zones, clip spacing tightens, sidelap stitch spacing shrinks, and perimeter details beef up with tested assemblies. Where snow loads are heavy, drifting at valleys and behind curbs demands taller curbs, robust crickets, and valley details that handle ice. In the Gulf Coast, salt accelerates corrosion, so fastener choice and protective coatings matter more.
Slope interacts with all of this. Low-slope metal roofing, from 0.5:12 to 2:12, belongs in the mechanically seamed category with factory sealant at seams and welded or soldered gutter and valley transitions per manufacturer specs. Trying to make a snap-lock panel behave on a 1:12 slope leads to callbacks. On steeper residential pitches, simple gravity helps, but wind-driven rain and rising heat still stress laps and sealant.
A local metal roofing company that understands your wind exposure, freeze-thaw cycles, and ambient corrosion risks will make different recommendations than a generic spec sheet. That local judgment shows up in details like adding an extra row of clips at the ridge, selecting a higher temp-rated pipe boot, or swapping sealant families.
Warranty and manufacturer guidance, not fine print to ignore
If a roof is under warranty, read the document before you touch it. Many panel manufacturers require specific sealant types, fastener specs, and even exact screw guns for warranty work. They are not being fussy; they are protecting a tested assembly. On newer commercial metal roofing projects with 20 year weathertight warranties, unauthorized modifications can void coverage.
Even without a formal warranty, the manufacturer’s technical bulletins carry weight. If their detail shows backer rod and a 3:1 width-to-depth sealant joint at a wall transition, follow it. Those details reflect lab and field testing, not habit.
Cost ranges that help budgeting
Costs vary by market, height, access, and hazard. Still, some ranges help set expectations.
- Replacing selective exposed fasteners and washers on a residential roof runs in the ballpark of 1.50 to 3.50 dollars per square foot for the affected areas, assuming safe access. The lower end applies to small quantities; the higher end includes lift rental and disposal. Resealing side laps with new butyl tape on through-fastened panels can run 2.00 to 5.00 dollars per linear foot of lap, depending on panel profile and underlayment condition. Re-seaming a double-lock standing seam with a portable seamer, including clip adjustments, often runs 4.00 to 8.00 dollars per linear foot when access is straightforward. Full elastomeric coating systems including prep and seam reinforcement typically fall between 2.50 and 6.00 dollars per square foot, with longer warranties at higher film builds. Localized penetration re-flashing, such as a new pipe boot with correct closure and sealant, often lands between 350 and 900 dollars per penetration, more if a curb needs fabrication.
These are working ranges to start a conversation with your local metal roofing services provider, not quotes. Site conditions matter.
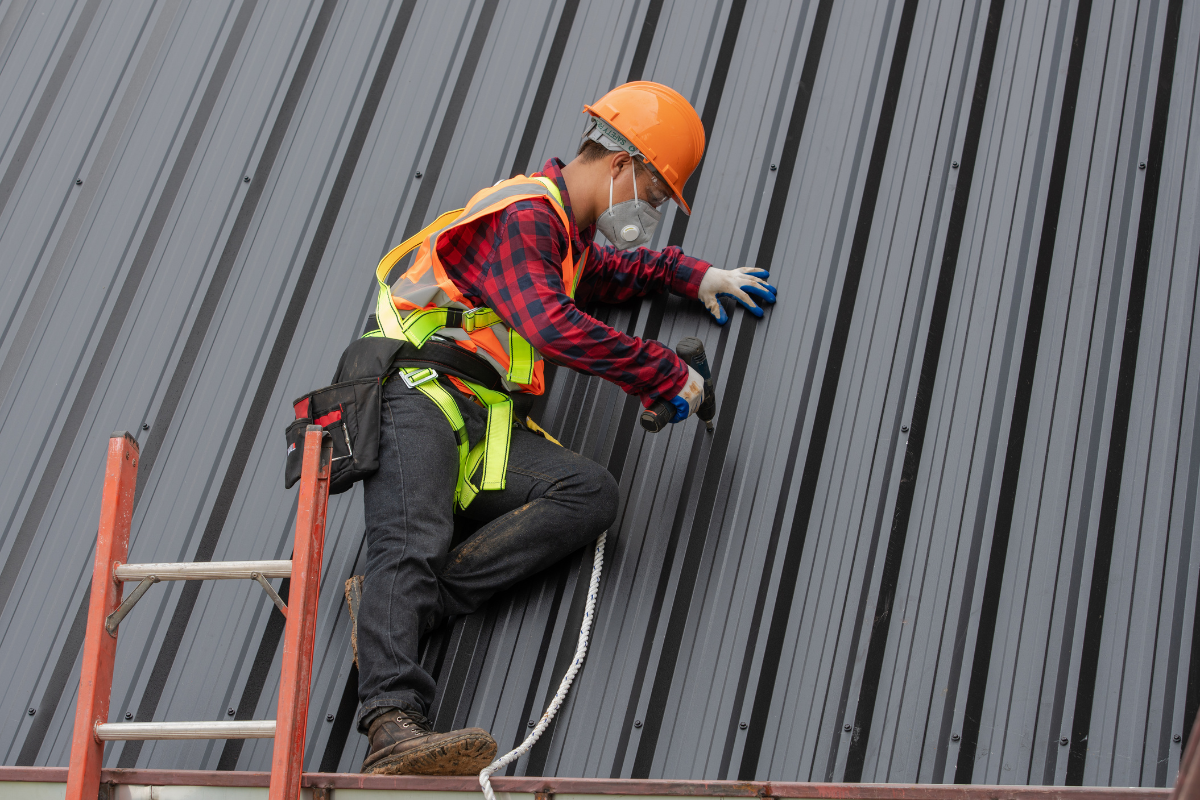
Safety and access are part of the craft
Metal is slippery, especially with dew or pollen. Edge protection, tie-off points, and lift access must be planned. I have declined work on steep residential metal roofing when anchor points were inadequate. The risk of a boot skid on a painted panel is real. A professional crew budgets time for staging and protection of landscaping, gutters, and neighboring finishes. That attention shows up in clean seams and unbent panels at the end of the job.
Choosing help: what to expect from a qualified contractor
There are plenty of general roofers who can handle shingles but who treat metal as just another system. A qualified metal roofing repair service looks different in small ways. They own seamers matched to the profile. They stock butyl tape in multiple widths and carry sealant that matches your panel finish. Their crews know how to read panel layout and can explain where to expect movement and why your leak shows up on a south wind but not in a gentle rain.
If you need more than a repair, ask whether the firm handles both metal roof repair and new metal roof installation. A contractor who also performs metal roofing installation develops better instincts about layout and movement, which leads to more durable repairs. On larger buildings, look for metal roofing contractors who self-perform flashings and can fabricate small custom parts to match your profile. That capability avoids makeshift solutions.
Most reputable companies will photograph seams before and after, note the products used, and provide a one to three year workmanship warranty on repairs. If they cannot name the panel manufacturer or do not ask about the building’s interior use and humidity, keep looking.
When replacement makes more sense than endless patching
Every owner reaches a threshold where repairs feel like chasing leaks around the roof. The calculus is not just cost. It is disruption, risk, and energy performance. Older roofs without underlayment or with marginal insulation benefit from a full metal roof replacement with a modern assembly that adds a slip sheet, thicker insulation, and improved air and vapor control. If the building houses sensitive equipment or inventory, the cost of a surprise leak may exceed the delta between continued repairs and a planned replacement.
A practical rule of thumb: if you are spending more than 10 to 15 percent of the replacement cost every year on repairs, and the roof is more than halfway through its expected service life, explore replacement options. Consider a retrofit framing system that corrects slope if ponding or snow drift issues are chronic. Many buildings with aging low-slope assemblies convert successfully to high-performing standing seam systems with engineered clip and purlin systems.
A brief field story
One winter we worked on a 24 gauge double-lock standing seam roof on a warehouse near a river. Leaks only showed up on cold, windy nights from the northwest. Daytime tests with a hose found nothing. We mapped the stains and realized they lined up with panel endlaps hidden below a ridge-mounted conveyor. The panels had been lapped by only 3 inches, with a thin bead of silicone instead of butyl. In cold wind, pressure pushed water uphill across that short lap. We staged at night, opened the laps, cleaned them, installed 2 inch butyl tape bands and a 6 inch cover plate at each lap, then re-seamed. The building stayed dry for the rest of the season and beyond. The difference was not magic sealant, it was respecting geometry, movement, and pressure.
Bringing it together
Metal roofing rewards disciplined work. Seams need correct geometry and compression, fasteners need right sizing and torque, and sealants need compatibility and joint design. A leak is usually a symptom of one of those fundamentals going wrong at a specific place.
If you are an owner or facility manager weighing options, start with a careful inspection. Triage the obvious: loose fasteners, missing closures, brittle sealant. Decide where a surgical repair restores original performance and where the assembly has aged past the point where repairs make sense. Lean on a local metal roofing company with experience in both repair and metal roof installation. They can calm the noise, prioritize the right details, and, when the time comes, carry the building forward with either a well-executed repair or a clean, warrantied replacement.
Metal Roofing – Frequently Asked Questions
What is the biggest problem with metal roofs?
The most common problems with metal roofs include potential denting from hail or heavy impact, noise during rain without proper insulation, and higher upfront costs compared to asphalt shingles. However, when properly installed, metal roofs are highly durable and resistant to many common roofing issues.
Is it cheaper to do a metal roof or shingles?
Asphalt shingles are usually cheaper upfront, while metal roofs cost more to install. However, metal roofing lasts much longer (40–70 years) and requires less maintenance, making it more cost-effective in the long run compared to shingles, which typically last 15–25 years.
How much does a 2000 sq ft metal roof cost?
The cost of a 2000 sq ft metal roof can range from $10,000 to $34,000 depending on the type of metal (steel, aluminum, copper), the style (standing seam, corrugated), labor, and local pricing. On average, homeowners spend about $15,000–$25,000 for a 2000 sq ft metal roof installation.
How much is 1000 sq ft of metal roofing?
A 1000 sq ft metal roof typically costs between $5,000 and $17,000 installed, depending on materials and labor. Basic corrugated steel panels are more affordable, while standing seam and specialty metals like copper or zinc can significantly increase the price.
Do metal roofs leak more than shingles?
When installed correctly, metal roofs are less likely to leak than shingles. Their large panels and fewer seams create a stronger barrier against water. Most leaks in metal roofing occur due to poor installation, incorrect fasteners, or lack of maintenance around penetrations like chimneys and skylights.
How many years will a metal roof last?
A properly installed and maintained metal roof can last 40–70 years, and premium metals like copper or zinc can last over 100 years. This far outperforms asphalt shingles, which typically need replacement every 15–25 years.
Does a metal roof lower your insurance?
Yes, many insurance companies offer discounts for metal roofs because they are more resistant to fire, wind, and hail damage. The amount of savings depends on the insurer and location, but discounts of 5%–20% are common for homes with metal roofing.
Can you put metal roofing directly on shingles?
In many cases, yes — metal roofing can be installed directly over asphalt shingles if local codes allow. This saves on tear-off costs and reduces waste. However, it requires a solid decking and underlayment to prevent moisture issues and to ensure proper installation.
What color metal roof is best?
The best color depends on climate, style, and energy efficiency needs. Light colors like white, beige, or light gray reflect sunlight and reduce cooling costs, making them ideal for hot climates. Dark colors like black, dark gray, or brown enhance curb appeal but may absorb more heat. Ultimately, the best choice balances aesthetics with performance for your region.